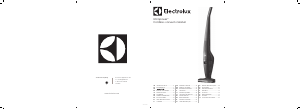
Rokasgrāmata Electrolux EUP8GREEN Putekļu sūcējs

Nepieciešama rokasgrāmata savam Electrolux EUP8GREEN Putekļu sūcējs? Zemāk var apskatīt un bez maksas lejupielādēt PDF rokasgrāmatu latviešu valodā. Šim produktam pašlaik ir 10 bieži uzdotie jautājumi, 0 komentāri un 1 balss ar vidējo produkta vērtējumu 0/100. Ja šī nav jūsu vēlamā rokasgrāmata, lūdzu, sazinieties ar mums.

Vai jūsu produkts ir bojāts, un rokasgrāmatā nav sniegts risinājums? Dodieties uz Repair Café, lai veiktu bezmaksas remontu.

Rokasgrāmata

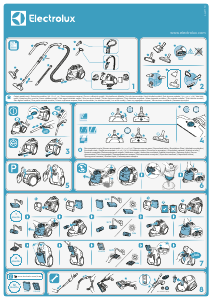
3www.electrolux.com2www.electrolux.com
13
11
5 6 7 8
15 16
17
9 10
12
1
3 42
14
For models EUP82xxx
UA
GB
FR
AR
BG
GR
NO
CZ
HR
PL
DA
HU
PT
DE
IT
RO
EE
LT
RU
ES
LV
SK
SR
FI
NL
SL
SV
TR
4www.electrolux.com
Electrolux reserves the right to change products, information and
specications without notice.
ENGLISH
Thank you for choosing an Electrolux Ultrapower® vacuum cleaner.
In order to ensure the best results, always use original Electrolux
accessories and spare parts. They have been designed especially for
your vacuum cleaner. This product is designed with the environment
in mind. All plastic parts are marked for recycling purposes.
DESCRIPTION OF ULTRAPOWER®
A. ON/OFF button
B. Power regulation button
C. Locking screw
D. Charging station, wall unit (*
E. Charging station, oor unit (*
F. Charging adapter
G. Fine lter (inner lter)
H. Pre lter (outer lter)
I. Release button, dust container
J. Dust container
(* Not available on models
EUP82xxx
K. Cable protector grill
L. Hatch cover for brush roll
M. Brush roll
N. BRUSHROLLCLEAN® pedal
O. Nozzle front lights
P. Charging indicator
Q. Cli hanger
R. Wall holder *)
S. Charging connector*)
*) Only on models EUP82xx.
BEFORE STARTING
Check that the package includes all parts described in this instruction
manual and read this manual carefully. Pay special attention to the
safety precautions chapter. Save these instructions.
1 Assemble the handle.
For model EUP82xx, use the wall holder *):
2 A) Make sure that Ultrapower® is on a stable and horizontal surface
away from heat sources, direct sunlight or wet places. Attach the wall
holder to the wall 104cm above the oor with a suitable screw and wall
plug. Make sure to use a correct wall plug for the wall.
B) Attach the handle to the wall holder.
C) Connect the charging cable to the back side of the vacuum cleaner.
For all other models:
3 Assemble the charging stand.
4 A) Connect the charging cable to the charge stand.
B) There is a hollow space in the bottom of the charging station where
unused cable can be wound.
C) Position the charging station on a stable and horizontal surface away
from heat sources, direct sunlight or wet places.
5 Insert the adaptor into the mains and charge Ultrapower®. The charging
indicator will be lit when Ultrapower® is on charge.
CHARGING ULTRAPOWER®
6 When fully charged, the charging indicator will blink slowly. The num-
bers of LED lamps will indicate the level of charge. Full charging time is
around 5hours. For better battery performance, charge Ultrapower® for
24hours before rst use and always keep it on charge when not used.
VACUUMING WITH ULTRAPOWER®
Before vacuuming, check that the nozzle wheels and the brush roll are
clean from sharp objects in order to avoid scratching sensitive oors
and to ensure full cleaning performance.
7 Start and stop Ultrapower® by pushing the ON/OFF button. Ultrapow-
er® has 3 power settings which is regulated with the
power regulation
button
.
Ultrapower®
will start on the “High power mode”.
For more silent cleaning and longest run time, press the power regula-
tion button to activate the “Long runtime mode”.
Press the power regulation button one more time to activate the “Nor-
mal cleaning mode”.
BRUSHROLLCLEAN® FUNCTION
Use the BRUSHROLLCLEAN® function to keep the brush roll clean and
free from hair and bres. For best results use the BRUSHROLLCLEAN®
function when
Ultrapower®
is fully charged.
8 Place Ultrapower® on a hard and at surface. Do not use the BRUSH-
ROLLCLEAN
®
function on carpets.
Press the BRUSHROLLCLEAN
®
pedal with your foot while the cleaner is
on. Hold for 5 seconds until hairs and bres are removed. There will be
a cutting noise during this process, this is normal. If hairs remain on the
brush roll, repeat the process.
The BRUSHROLLCLEAN
®
function is equipped with an overheating
protection. If the BRUSHROLLCLEAN
®
function has been used for more
than 30 seconds (constant or interrupted) it will deactivate the brush
roll and turn o the nozzle front lights. The vacuum cleaner can still be
used, even when the BRUSHROLLCLEAN
®
function is deactivated. To re-
activate the BRUSHROLLCLEAN
®
function, place Ultrapower® on charge
and charge for 15minutes.
Please note that the BRUSHROLLCLEAN® function might not be able to
remove thicker threads or wires that are caught in the brush roll.
EMPTYING OF THE DUST CONTAINER
9 Remove the dust container by pressing the button.
10 Take out the lters from the dust container by pressing the release but-
tons.
Empty the contents into a dustbin. Never wash the dust container
or lters in a dishwasher.
IMPORTANT - FILTER CLEANING!
11 The lters must be cleaned at regular intervals to ensure a high clean-
ing performance.
Take out the lters by pressing the release buttons.
Separate the inner lter from the outer lter.
12 Rinse the lter parts carefully under lukewarm water without using any
detergents. (Never use the dishwasher or washing machine.) S
hake to
remove excess water and leave to dry minimum 12h before putting
them back into the cleaner.
CLEANING THE HOSE AND NOZZLE WHEELS
13 Loosen the hose behind the nozzle from its upper connection. Remove
any object or debris that can be blocking the airow in the hose or in
the air channel to the dust cup, and put the hose back.
14 If the wheels need to be cleaned or get jammed, remove them carefully
by using a at screwdriver.
REMOVING AND CLEANING THE BRUSH ROLL
15 If the brushroll gets blocked Ultrapower® will stop. Open the cable
protector grill and the brush roll hatch cover and remove the brush roll.
16 Us
e a pair of scissors to remove threads etc. Reassemble the brush roll,
making sure it can spin freely.
REMOVING THE BATTERIES FOR RECYCLING
Warning; Battery removal must only be done by an Electrolux
service center or ocial collection point!
17 Only remove batteries if the product is to be scrapped. Improper
handling of the batteries may be hazardous. Batteries should always
be completely discharged before removal.
Take your product to an
Electrolux service center or ocial collection point for recycling. They
can remove and recycle the battery and electric parts in a safe and pro-
fessional way
.
Follow your countrys rules for collection of rechargeable
batteries and electrical products.
Enjoy a great cleaning experience with Ultrapower®!
Lejupielādēt rokasgrāmatu latviešu valodā (PDF, 2.72 MB)
(Apsveriet ietekmi uz vidi un drukājiet šo rokasgrāmatu tikai tad, ja tas patiešām ir nepieciešami)

Vērtējums

Paziņojiet mums, ko jūs domājat par Electrolux EUP8GREEN Putekļu sūcējs, novērtējot produktu. Vai vēlaties dalīties pieredzē ar šo produktu vai uzdot jautājumu? Ievadiet savu komentāru lapas apakšdaļā.
Vai esat apmierināts ar Electrolux EUP8GREEN Putekļu sūcējs?
0%
100%
1 vērtējums

Pievienoties sarunai par šo produktu

Šeit varat dalīties savās domās par Electrolux EUP8GREEN Putekļu sūcējs. Ja jums ir jautājumi, vispirms rūpīgi izlasiet rokasgrāmatu. Rokasgrāmatu var pieprasīt, izmantojot mūsu saziņas veidlapu.

Vairāk par šo rokasgrāmatu

Mēs saprotam, ka ir patīkami, ka jūsu Electrolux EUP8GREEN Putekļu sūcējs ir papīra rokasgrāmata. Jūs vienmēr varat lejupielādēt rokasgrāmatu no mūsu vietnes un pats to izdrukāt. Ja vēlaties saņemt oriģinālo rokasgrāmatu, iesakām sazināties ar Electrolux. Viņi varētu nodrošināt oriģinālu rokasgrāmatu. Vai meklējat sava Electrolux EUP8GREEN Putekļu sūcējs rokasgrāmatu citā valodā? Izvēlieties vēlamo valodu mūsu mājaslapā un meklējiet modeļa numuru, lai redzētu, vai tas ir pieejams.

Specifikācijas

Zīmols Electrolux
Modelis EUP8GREEN
Kategorija Putekļu sūcēji
Faila veids PDF
Faila lielums 2.72 MB

Visas rokasgrāmatas par Electrolux Putekļu sūcēji
Citas Putekļu sūcēji rokasgrāmatas

Bieži uzdotie jautājumi par Electrolux EUP8GREEN Putekļu sūcējs

Mūsu atbalsta komanda meklē noderīgu informāciju par produktu un atbild uz bieži uzdotajiem jautājumiem. Ja atrodat ko nepareizu bieži uzdotajos jautājumos, informējiet mūs, izmantojot saziņas veidlapu.

Mana putekļsūcēja šļūtene ir aizsērējusi. Ko darīt? Apstiprināts

Atvienojiet šļūteni un apskatiet to, lai noteiktu, vai tā patiešām ir aizsērējusi. Šādā gadījumā varat paņemt garu priekšmetu, piemēram, slotas kātu, un uzmanīgi izstumt to caur šļūteni. Tas parasti noņems visus priekšmetus, kas aizsprosto šļūteni. Ja tas nepalīdzēja, sazinieties ar ražotāju.

Tas bija noderīgi (1464) Lasīt vairāk

Kādu izmēru putekļu maisiņi tur ir? Apstiprināts

Ir jāņem vērā divi izmēri. Pirmkārt, ir plāksnes izmērs ar maisa ieeju. Tas nosaka, vai putekļu maisiņš derēs noteiktam putekļu sūcējam. Tad ir somas izmērs. Pārsvarā tas ir norādīts litros un nosaka, cik daudz putekļu maisiņš var saturēt.

Tas bija noderīgi (944) Lasīt vairāk

Vēlos uzzināt savas Electrolux ierīces vecumu. Kā lai es to izdaru? Apstiprināts

Jūs varat noteikt sava produkta vecumu, izmantojot sērijas numuru. To var atrast savā ierīcē. Sērijas numura pirmā rakstzīme norāda gadu (ti, 1 = 2001), un divas rakstzīmes pēc tam norāda ražošanas nedēļu (ti, 35 = attiecīgā gada 35. nedēļa). Tātad sērijas numurs 13500016 norāda, ka iekārta ir no 2001. gada 35. nedēļas.

Tas bija noderīgi (836) Lasīt vairāk

Mana putekļsūcēja strāvas vads netiek uztīts atpakaļ ierīcē. Ko es varu darīt? Apstiprināts

Iespējams, ka auklā ir vītums vai ieloce. Dažas reizes pilnībā izritiniet vadu un roku vadībā attiniet to atpakaļ ierīcē. Ja tas neatrisina problēmu, iespējams, ir bojāts vada attīšanas mehānisms. Tādā gadījumā sazinieties ar ražotāju vai remonta servisu.

Tas bija noderīgi (658) Lasīt vairāk

Mans putekļsūcējs rada svilpojošu troksni. Ko darīt? Apstiprināts

Šo problēmu bieži izraisa pilns putekļu maisiņš vai filtrs vai atvere, kas ļauj gaisam iekļūt šļūtenē. Pārbaudiet putekļu maisu un filtru un, ja nepieciešams, nomainiet tos. Pārbaudiet, vai šļūtenē nav caurumu vai sliktu savienojumu. Ja tas neatrisina problēmu, sazinieties ar ražotāju.

Tas bija noderīgi (553) Lasīt vairāk

Kā noņemt putekļus un matus no putekļsūcēja sukas galviņas? Apstiprināts

Putekļu un matu noņemšana no putekļsūcēja birstes galvas ir veikta manuāli. Ja tas neizdodas, kā vēlaties, atlikušo netīrumu noņemšanai varat izmantot smalku ķemmi.

Tas bija noderīgi (536) Lasīt vairāk

Kādu iestatījumu uz putekļsūcēja sukas uzgaļa man vajadzētu izmantot? Apstiprināts

Gandrīz visiem putekļu sūcējiem ir galva ar regulējamu suku. Izmantojiet suku cietām virsmām, lai izvairītos no skrāpējumiem un bojājumiem. Izslēdziet paklāju un paklāju suku.

Tas bija noderīgi (420) Lasīt vairāk

Vai es varu izmantot papīra putekļu maisiņu vairāk nekā vienu reizi? Apstiprināts

Tas nav ieteicams. Maisiņa wat poras tiks piesātinātas, izraisot sūkšanas zudumu un, iespējams, motora bojājumus.

Tas bija noderīgi (287) Lasīt vairāk

Kas ir HEPA? Apstiprināts

HEPA ir saīsinājums no High-Efficiency Particulate Air. Daudziem putekļu sūcējiem ir HEPA filtrs. HEPA filtrs aizturēs vismaz 85% un ne vairāk kā 99,999995% no visām daļiņām, kuru izmērs ir 0,3 mikrometri (µm) un vairāk.

Tas bija noderīgi (260) Lasīt vairāk

Vai es varu izmantot parasto putekļu sūcēju, lai uzsūktu pelnus? Apstiprināts

Nē, tas absolūti nav iespējams. Pelni, kas šķiet atdzisuši, iekšpusē joprojām var būt silti vai pat karsti. Parasts putekļsūcējs tam nav paredzēts un var izraisīt ugunsgrēku. Arī parasto putekļsūcēju filtri ne vienmēr ir piemēroti ārkārtīgi mazu daļiņu, piemēram, pelnu, aizturēšanai. Pēc tam tas var sasniegt putekļsūcēja motoru un izraisīt bojājumus.

Tas bija noderīgi (251) Lasīt vairāk
Rokasgrāmata Electrolux EUP8GREEN Putekļu sūcējs

Saistītie produkti

Saistītās kategorijas