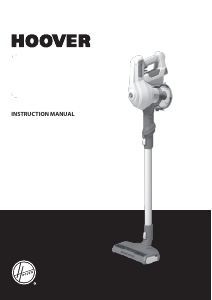
Rokasgrāmata Hoover HY73PET 011 Putekļu sūcējs
Nepieciešama rokasgrāmata savam Hoover HY73PET 011 Putekļu sūcējs? Zemāk var apskatīt un bez maksas lejupielādēt PDF rokasgrāmatu latviešu valodā. Šim produktam pašlaik ir 9 bieži uzdotie jautājumi, 0 komentāri un 0 balsis. Ja šī nav jūsu vēlamā rokasgrāmata, lūdzu, sazinieties ar mums.
Vai jūsu produkts ir bojāts, un rokasgrāmatā nav sniegts risinājums? Dodieties uz Repair Café, lai veiktu bezmaksas remontu.
Rokasgrāmata


Vērtējums
Paziņojiet mums, ko jūs domājat par Hoover HY73PET 011 Putekļu sūcējs, novērtējot produktu. Vai vēlaties dalīties pieredzē ar šo produktu vai uzdot jautājumu? Ievadiet savu komentāru lapas apakšdaļā.Vairāk par šo rokasgrāmatu
Mēs saprotam, ka ir patīkami, ka jūsu Hoover HY73PET 011 Putekļu sūcējs ir papīra rokasgrāmata. Jūs vienmēr varat lejupielādēt rokasgrāmatu no mūsu vietnes un pats to izdrukāt. Ja vēlaties saņemt oriģinālo rokasgrāmatu, iesakām sazināties ar Hoover. Viņi varētu nodrošināt oriģinālu rokasgrāmatu. Vai meklējat sava Hoover HY73PET 011 Putekļu sūcējs rokasgrāmatu citā valodā? Izvēlieties vēlamo valodu mūsu mājaslapā un meklējiet modeļa numuru, lai redzētu, vai tas ir pieejams.
Specifikācijas
| Zīmols | Hoover |
| Modelis | HY73PET 011 |
| Kategorija | Putekļu sūcēji |
| Faila veids | |
| Faila lielums | 1.86 MB |
Visas rokasgrāmatas par Hoover Putekļu sūcēji
Citas Putekļu sūcēji rokasgrāmatas
Bieži uzdotie jautājumi par Hoover HY73PET 011 Putekļu sūcējs
Mūsu atbalsta komanda meklē noderīgu informāciju par produktu un atbild uz bieži uzdotajiem jautājumiem. Ja atrodat ko nepareizu bieži uzdotajos jautājumos, informējiet mūs, izmantojot saziņas veidlapu.
Mana putekļsūcēja šļūtene ir aizsērējusi. Ko darīt? Apstiprināts
Atvienojiet šļūteni un apskatiet to, lai noteiktu, vai tā patiešām ir aizsērējusi. Šādā gadījumā varat paņemt garu priekšmetu, piemēram, slotas kātu, un uzmanīgi izstumt to caur šļūteni. Tas parasti noņems visus priekšmetus, kas aizsprosto šļūteni. Ja tas nepalīdzēja, sazinieties ar ražotāju.
Tas bija noderīgi (1482) Lasīt vairākKādu izmēru putekļu maisiņi tur ir? Apstiprināts
Ir jāņem vērā divi izmēri. Pirmkārt, ir plāksnes izmērs ar maisa ieeju. Tas nosaka, vai putekļu maisiņš derēs noteiktam putekļu sūcējam. Tad ir somas izmērs. Pārsvarā tas ir norādīts litros un nosaka, cik daudz putekļu maisiņš var saturēt.
Tas bija noderīgi (995) Lasīt vairākMana putekļsūcēja strāvas vads netiek uztīts atpakaļ ierīcē. Ko es varu darīt? Apstiprināts
Iespējams, ka auklā ir vītums vai ieloce. Dažas reizes pilnībā izritiniet vadu un roku vadībā attiniet to atpakaļ ierīcē. Ja tas neatrisina problēmu, iespējams, ir bojāts vada attīšanas mehānisms. Tādā gadījumā sazinieties ar ražotāju vai remonta servisu.
Tas bija noderīgi (687) Lasīt vairākMans putekļsūcējs rada svilpojošu troksni. Ko darīt? Apstiprināts
Šo problēmu bieži izraisa pilns putekļu maisiņš vai filtrs vai atvere, kas ļauj gaisam iekļūt šļūtenē. Pārbaudiet putekļu maisu un filtru un, ja nepieciešams, nomainiet tos. Pārbaudiet, vai šļūtenē nav caurumu vai sliktu savienojumu. Ja tas neatrisina problēmu, sazinieties ar ražotāju.
Tas bija noderīgi (583) Lasīt vairākKā noņemt putekļus un matus no putekļsūcēja sukas galviņas? Apstiprināts
Putekļu un matu noņemšana no putekļsūcēja birstes galvas ir veikta manuāli. Ja tas neizdodas, kā vēlaties, atlikušo netīrumu noņemšanai varat izmantot smalku ķemmi.
Tas bija noderīgi (561) Lasīt vairākKādu iestatījumu uz putekļsūcēja sukas uzgaļa man vajadzētu izmantot? Apstiprināts
Gandrīz visiem putekļu sūcējiem ir galva ar regulējamu suku. Izmantojiet suku cietām virsmām, lai izvairītos no skrāpējumiem un bojājumiem. Izslēdziet paklāju un paklāju suku.
Tas bija noderīgi (434) Lasīt vairākVai es varu izmantot papīra putekļu maisiņu vairāk nekā vienu reizi? Apstiprināts
Tas nav ieteicams. Maisiņa wat poras tiks piesātinātas, izraisot sūkšanas zudumu un, iespējams, motora bojājumus.
Tas bija noderīgi (302) Lasīt vairākVai es varu izmantot parasto putekļu sūcēju, lai uzsūktu pelnus? Apstiprināts
Nē, tas absolūti nav iespējams. Pelni, kas šķiet atdzisuši, iekšpusē joprojām var būt silti vai pat karsti. Parasts putekļsūcējs tam nav paredzēts un var izraisīt ugunsgrēku. Arī parasto putekļsūcēju filtri ne vienmēr ir piemēroti ārkārtīgi mazu daļiņu, piemēram, pelnu, aizturēšanai. Pēc tam tas var sasniegt putekļsūcēja motoru un izraisīt bojājumus.
Tas bija noderīgi (273) Lasīt vairākKas ir HEPA? Apstiprināts
HEPA ir saīsinājums no High-Efficiency Particulate Air. Daudziem putekļu sūcējiem ir HEPA filtrs. HEPA filtrs aizturēs vismaz 85% un ne vairāk kā 99,999995% no visām daļiņām, kuru izmērs ir 0,3 mikrometri (µm) un vairāk.
Tas bija noderīgi (272) Lasīt vairāk


Pievienoties sarunai par šo produktu
Šeit varat dalīties savās domās par Hoover HY73PET 011 Putekļu sūcējs. Ja jums ir jautājumi, vispirms rūpīgi izlasiet rokasgrāmatu. Rokasgrāmatu var pieprasīt, izmantojot mūsu saziņas veidlapu.