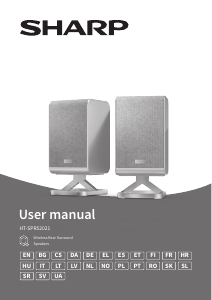
Rokasgrāmata Sharp HT-SPR52021(SL) Skaļrunis

Nepieciešama rokasgrāmata savam Sharp HT-SPR52021(SL) Skaļrunis? Zemāk var apskatīt un bez maksas lejupielādēt PDF rokasgrāmatu latviešu valodā. Šim produktam pašlaik ir 5 bieži uzdotie jautājumi, 0 komentāri un 0 balsis. Ja šī nav jūsu vēlamā rokasgrāmata, lūdzu, sazinieties ar mums.

Vai jūsu produkts ir bojāts, un rokasgrāmatā nav sniegts risinājums? Dodieties uz Repair Café, lai veiktu bezmaksas remontu.

Rokasgrāmata

Loading…
EN
Box contents
Left rear surround speaker
Right rear surround speaker
EU AC power cable (2 pcs)
UK AC power cable (2 pcs)
Speaker wall-mount xings
User manual
Warranty card
Controls
Rear surround speaker
(Refer to 1 on page 1)
1. PAIR indicator.
2.
button – Please refer to section "Speaker pairing".
3. Wall mount / screw hook.
4. AC IN power input.
Placement and mounting
Placement
To enjoy immersive audio from your Sharp Q wireless rear surround
speakers, place the speakers behind your preferred listening position,
ideally at ear level. The speakers can be placed on speaker stands,
furniture or you can mount the speakers to a suitable wall.
NOTE:
Refer to the rating label on the back of each speaker to check if it is the
left or right speaker.
is for the left speaker and is for the right
speaker.
A Place the speakers upright on the speaker stands/furniture at ear
level behind your preferred listening position. (Refer to
4 on
page 1)
B Place the speakers on the wall using wall mounts at ear level behind
your preferred listening position. (Refer to
5 on page 1)
IMPORTANT NOTES:
Do not mount the speakers too close to the ceiling. The minimum
distance between the speaker and the ceiling should be 50cm.
The height eect won't be noticeable in rooms with very high ceilings.
Installation must be carried out by qualied personnel only. Incorrect
assembly can result in severe personal injury and property damage (if
you intend to install this product yourself, you must check for installations
such as electrical wiring and plumbing that may be buried inside the
wall). It is the installer’s responsibility to verify that the wall will safely
support the total load of the unit and wall brackets.
Additional tools (not included) are required for the installation.
Do not over-tighten screws.
Keep this user manual for future reference.
Use an electronic stud nder to check the wall type before drilling and
mounting.
Your wall mount preference will determine the type of wall mounting
option you use on the speaker.
A: Using the wall mount hole
Refer to the table below and 2 on page 1. Ensure the correct screw
is used.
A:
Depth of wall bracket plate (mm)
B:
Length of screw required
MIN~MAX (mm)
2-6mm 14 mm
NOTES:
The depth of the screw hole on the speaker is 17.4 mm
The correct screw type to use is:
Imperial: 1/4-20 inch
Metric: 6.35 mm diameter, 1.27 mm thread pitch
When mounting to the wall, remove the plastic stand.
B: Using the slot and hook mount
Wall mount the speakers using the slot and hook mount. (Refer to
3 on page 1)
Ensure the screw used will t into the wall mount hook securely.
NOTES:
When using the slot and hook mount, ensure that the speakers are not
free to move around freely.
When mounting to the wall, remove the plastic stand.
Initial set up
Connect to power
Risk of product damage! Ensure that the power supply voltage
corresponds to the voltage printed on the back of the unit.
Connect the power cable to the AC IN socket of the unit and then into
a mains socket.
Speaker pairing
Manual pairing
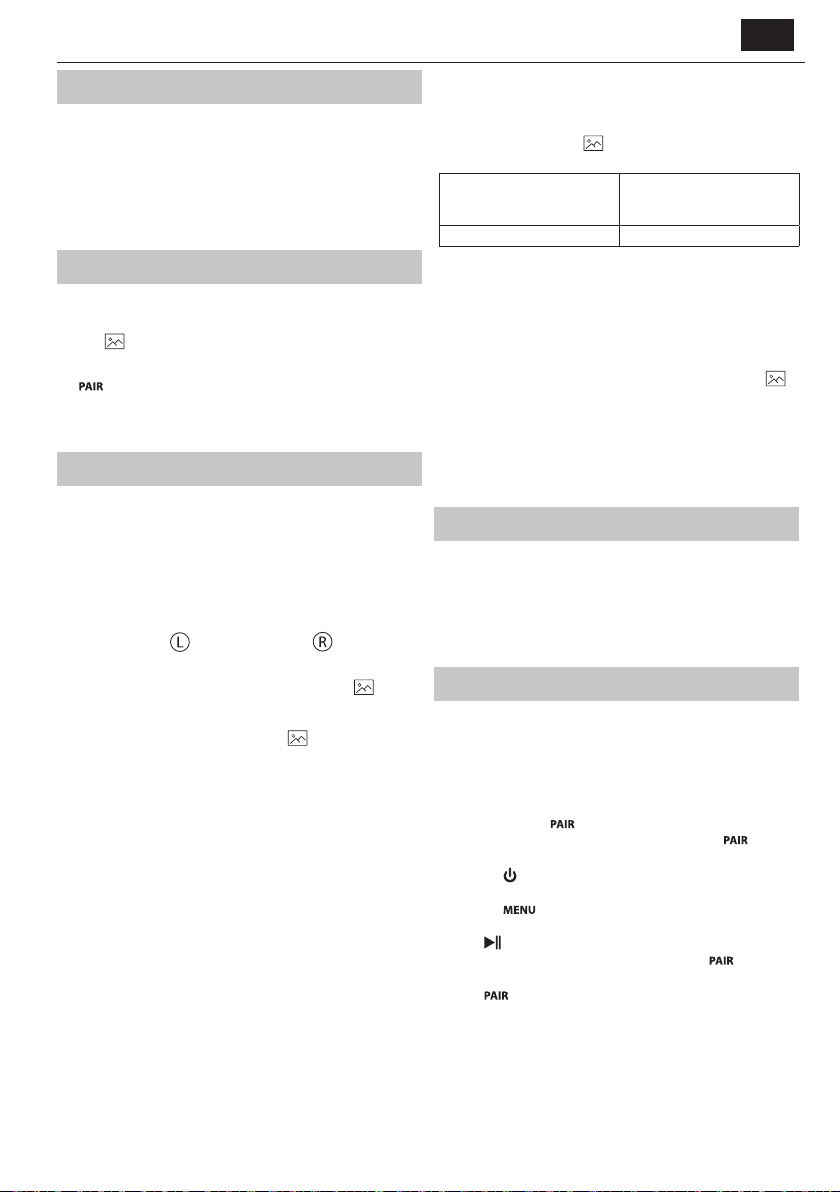
You will need to manually pair the rear surround speakers to the
soundbar before you can use them with the soundbar.
1. Ensure that all the cables are securely connected and the soundbar
is in STANDBY.
2. Press and hold the
button on the rear of the speaker for 3
seconds. The speaker will enter pairing mode and the
indicator
will ash quickly.
3. Press the
button on the soundbar or on the remote control to
switch the soundbar on.
4. Press the
button on the remote control, then use the
directional control on the remote control to highlight <WLPAIR>.
Press
and wait for 5 seconds.
5. When the speaker is paired with the main unit, the
Indicator
will be solid and the soundbar will display <PAIRED>.
6. If the
indicator blinks, the wireless connection has failed. The
soundbar will display <SPK NC>.
Unplug the power cable from the speaker and then reconnect the
power cable after 4 minutes. Repeat steps 1 ~ 4.
NOTE:
If the wireless connection fails again, check if there is conict or strong
interference (for example, interference from an electronic device) around
Lejupielādēt rokasgrāmatu latviešu valodā (PDF, 5.0 MB)
(Apsveriet ietekmi uz vidi un drukājiet šo rokasgrāmatu tikai tad, ja tas patiešām ir nepieciešami)

Loading…

Vērtējums

Paziņojiet mums, ko jūs domājat par Sharp HT-SPR52021(SL) Skaļrunis, novērtējot produktu. Vai vēlaties dalīties pieredzē ar šo produktu vai uzdot jautājumu? Ievadiet savu komentāru lapas apakšdaļā.
Vai esat apmierināts ar Sharp HT-SPR52021(SL) Skaļrunis?
Novērtējiet šo produktu pirmais
0 vērtējumi

Pievienoties sarunai par šo produktu

Šeit varat dalīties savās domās par Sharp HT-SPR52021(SL) Skaļrunis. Ja jums ir jautājumi, vispirms rūpīgi izlasiet rokasgrāmatu. Rokasgrāmatu var pieprasīt, izmantojot mūsu saziņas veidlapu.

Vairāk par šo rokasgrāmatu

Mēs saprotam, ka ir patīkami, ka jūsu Sharp HT-SPR52021(SL) Skaļrunis ir papīra rokasgrāmata. Jūs vienmēr varat lejupielādēt rokasgrāmatu no mūsu vietnes un pats to izdrukāt. Ja vēlaties saņemt oriģinālo rokasgrāmatu, iesakām sazināties ar Sharp. Viņi varētu nodrošināt oriģinālu rokasgrāmatu. Vai meklējat sava Sharp HT-SPR52021(SL) Skaļrunis rokasgrāmatu citā valodā? Izvēlieties vēlamo valodu mūsu mājaslapā un meklējiet modeļa numuru, lai redzētu, vai tas ir pieejams.

Specifikācijas

Zīmols Sharp
Modelis HT-SPR52021(SL)
Kategorija Skaļruņi
Faila veids PDF
Faila lielums 5.0 MB

Visas rokasgrāmatas par Sharp Skaļruņi
Citas Skaļruņi rokasgrāmatas

Bieži uzdotie jautājumi par Sharp HT-SPR52021(SL) Skaļrunis

Mūsu atbalsta komanda meklē noderīgu informāciju par produktu un atbild uz bieži uzdotajiem jautājumiem. Ja atrodat ko nepareizu bieži uzdotajos jautājumos, informējiet mūs, izmantojot saziņas veidlapu.

Es vēlos pievienot skaļruni savam televizoram, izmantojot HDMI, kuru portu man vajadzētu izmantot? Apstiprināts

Jums ir jāizmanto HDMI-ARC ports, kas ir īpaši paredzēts audio aprīkojuma pievienošanai.

Tas bija noderīgi (1488) Lasīt vairāk

Ko frekvences saka par manu skaļruni? Apstiprināts

Tas norāda frekvenču diapazonu, ko skaļrunis var radīt. Lielāks frekvenču diapazons nodrošinās lielākas skaņas variācijas un radīs augstākas kvalitātes skaņu.

Tas bija noderīgi (795) Lasīt vairāk

Kad mana mūzika ir pārāk skaļa? Apstiprināts

Skaņas, kas pārsniedz 80 decibelus (dB), var sabojāt dzirdi. Skaņas virs 120 dB nekavējoties bojā dzirdi. Bojājuma smagums ir atkarīgs no tā, cik bieži un cik ilgi ir skaņa.

Tas bija noderīgi (477) Lasīt vairāk

Vai Bluetooth darbojas caur sienām un griestiem? Apstiprināts

Bluetooth signāls darbosies caur sienām un griestiem, ja vien tie nav izgatavoti no metāla. Atkarībā no sienas biezuma un materiāla signāls var zaudēt spēku.

Tas bija noderīgi (238) Lasīt vairāk

Līdz kādam trokšņa līmenim tas ir drošs bērniem? Apstiprināts

Bērniem dzirde tiek bojāta ātrāk nekā pieaugušajiem. Tāpēc ir svarīgi nekad nepakļaut bērnus trokšņiem, kas skaļāki par 85 dB. Austiņu gadījumā ir īpaši modeļi bērniem. Skaļruņu vai citās situācijās jums jābūt uzmanīgiem, troksnis nepārsniedz šo līmeni.

Tas bija noderīgi (212) Lasīt vairāk
Rokasgrāmata Sharp HT-SPR52021(SL) Skaļrunis

Saistītie produkti

Saistītās kategorijas

×
Download